QuickBooks Enterprise Versioning Note
Intuit has made a change in the latest version of QuickBooks Desktop (aka QuickBooks Enterprise - QBE) such that if you or your customers choose to update your on-prem QuickBooks installation, the existing versions of the Ground2Cloud (G2C) QB Connector will no longer function. This Intuit update supports SDK 14 as the default version, but Cloud Elements still leverages SDK 13.0 and was depending on the returned version from QB to make its decision. This is breaking the existing connector as the existing QB connector is built with version 13 of the SDK.
The solution is to install the new QB Connector bundled in G2C version 0.6.32 (https://github.com/cloud-elements/g2c-releases/releases/tag/v0.6.32) that caps the SDK version; Cloud Elements will release a longer-term solution that allows you to use the correct versions. Note that if the Intuit/QuickBooks update is installed with an old QB Connector, then any element request attempts will fail with a 500 response indicating "Unsupported qbXML version".
API Provider Setup
To authenticate a QuickBooks Enterprise instance you must first run the bundled Ground2Cloud installer for QuickBooks on the machine running QuickBooks. The bundled installer walks you through the steps to install Ground2Cloud, the Cloud Elements QuickBooks Connector (CE Connector), and the Intuit QuickBooks QBXML SDK. Ground2Cloud and the CE Connector enable the Cloud Elements servers to communicate with an on premise installation of QuickBooks Enterprise. The Intuit QuickBooks SDK facilitates communication between the connector and QuickBooks.
Your Cloud Elements CSM or Delivery Manager typically helps with the initial setup of Ground2Cloud and will provide the appropriate installer.
After you install Ground2Cloud and the CE Connector, use the Configured Application Name and Host Name/IP to authenticate an element instance. If you already installed Ground2Cloud and just need to locate your information, see Locate Credentials for Authentication. If you need to install Ground2Cloud, see Install Ground2Cloud
Locate Credentials for Authentication
If you already installed Ground2Cloud and the CE Connector, follow the steps below to locate the Configured Application Name and Host Name/IP.
To find authentication information:
- Open the CE Connector.
- Find the Configured Application Name under Authorize.
- Find the Host Name/IP under Registrations.

Install and Set Up Ground2Cloud
The bundled Ground2Cloud installer for QuickBooks (Ground2CloudQbSetup_n.n.n.exe) installs the Ground2Cloud client, the CE Connector, and the Intuit QuickBooks SDK. Before you begin, make sure that you are logged in as a user with administrator privileges and pause or disable your antivirus software during installation.
To install Ground2Cloud:
- Run the Ground2Cloud Setup wizard (Ground2CloudQbSetup_0.5.20.exe).
- If asked, allow Ground2Cloud Setup to run.
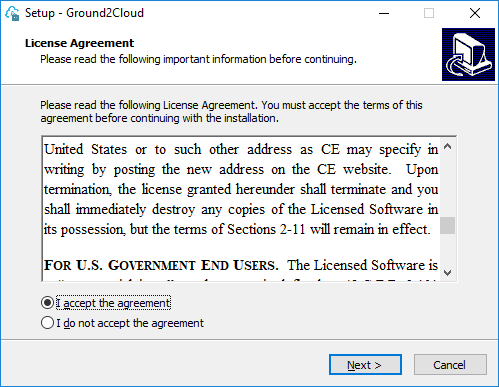
- Read and accept the License Agreement, and then click Next.
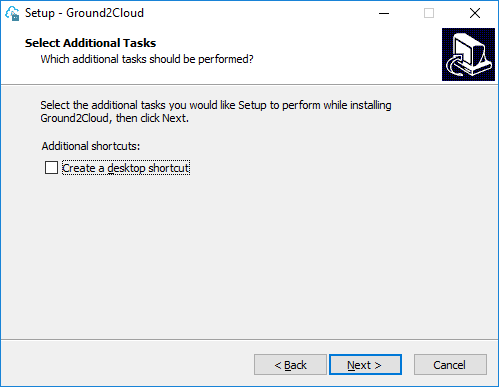
- Optionally choose to create a desktop shortcut, and then click Next.
On the Ready to Install step, click Install.
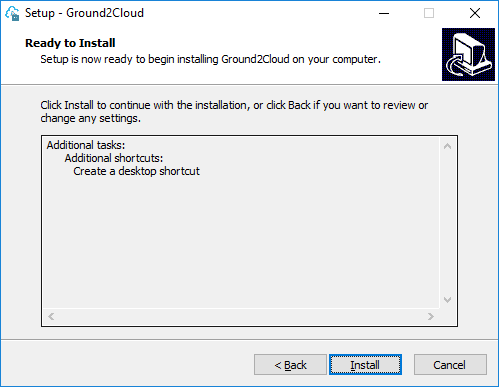
The Ground2Cloud Setup wizard installs Ground2Cloud on your computer.
Click Finish on the Ground2Cloud Setup wizard.
The installation adds the QuickBooks QBXML SDK and prompts you to install the CE Connector application.
Click Install.
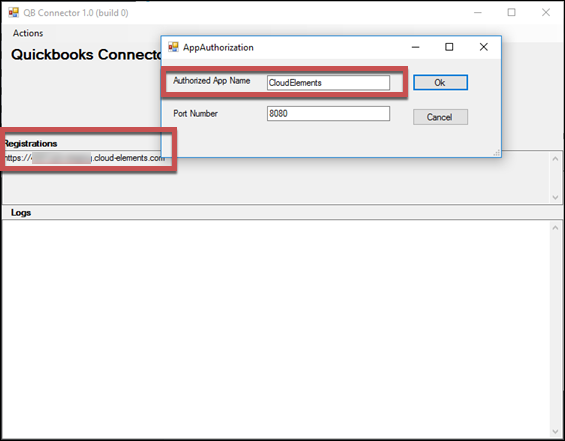
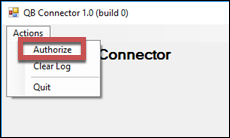
The Quickbooks Connector starts automatically. To connect to QuickBooks, you must authorize the CE Connector as an application.
Click Actions, and then click Authorize.
In Authorized App Name enter a name for the connection. The name is used as the Configured Application Name when you authenticate an element instance.
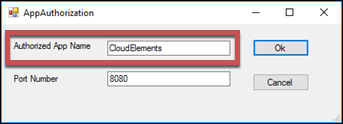
Keep the default port number and click OK.
Note the url under Registrations. This is used as the Host Name/IP when you authenticate an element instance. If you have not created an application, you need one to authenticate with QuickBooks Enterprise.


