Installing Magento 2.0+ - Ubuntu 16.04 hosted on DigitalOcean
First, a special thank you to the DigitalOcean Community for writing such an awesome article on installing Magento 1.9 on Ubuntu 14.04. The majority of the steps are going to be the same; this article will highlight the differences from the DigitalOcean Article to Install Magento 2.x (Latest Release) on Ubuntu 16.04 (Latest Release)
Prerequisites:
- Assumes basic knowledge of using terminal commands and flags
- Digital Ocean Account (It's cheap). Sign up: https://www.digitalocean.com
- A wireless connection with port 22 open (SSH)
Steps:
- Create a LAMP (Linux, Apache, MySql, PHP) Ubuntu 16.04 pre-configured DigitalOcean Droplet with SSH
- Create a non-root sudo user on your Ubuntu 16.04 Droplet (image)
- Configure Apache Virtual Host
- Configure PHP for Magento 2.x
- Create a MySQL Database User in a pre-configured LAMP DigitalOcean Droplet
- Download and Set Up Magento Files for Magento 2.x
- Complete Magento Setup in the UI
- Launch Magento and generate API credentials
Step 1: Create a LAMP (Linux, Apache, MySql, PHP) Ubuntu 16.04 pre-configured DigitalOcean Droplet with SSH
- Generate an SSH Key
- First let's generate an SSH key we will use when setting up our DigitalOcean Droplet, this will give us easy access to our Ubuntu Server
- Open a terminal and run the command
ssh-keygen - The result should look something like this, here I have used -f to change where my key is saved:
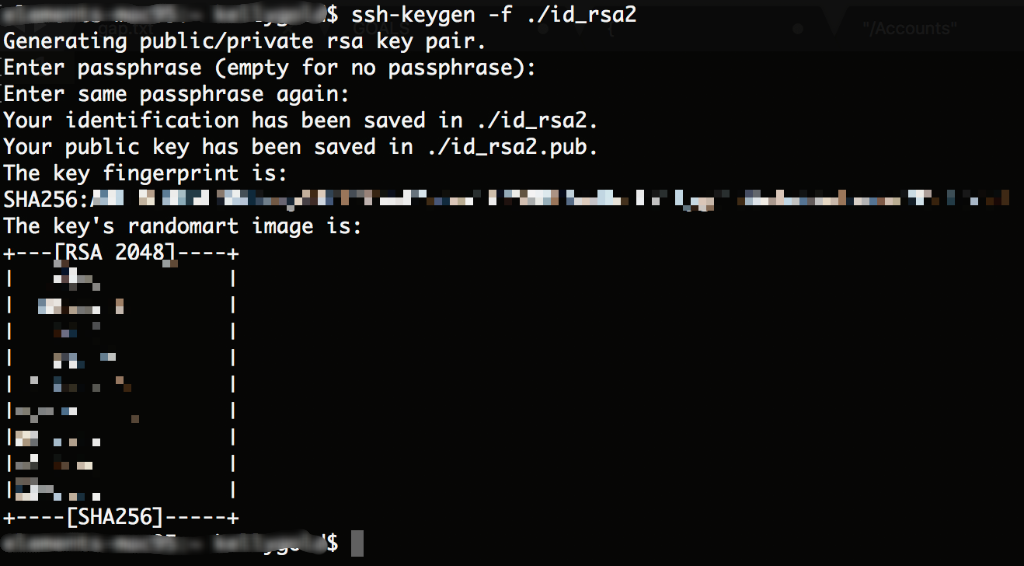
- By default the Public Key key is saved to
~/.ssh/id_rsa.pub - Run
copy the entire output, this is your SSH Public Key —Save it.cat ~/.ssh/id_rsa.pub
- Create The Droplet
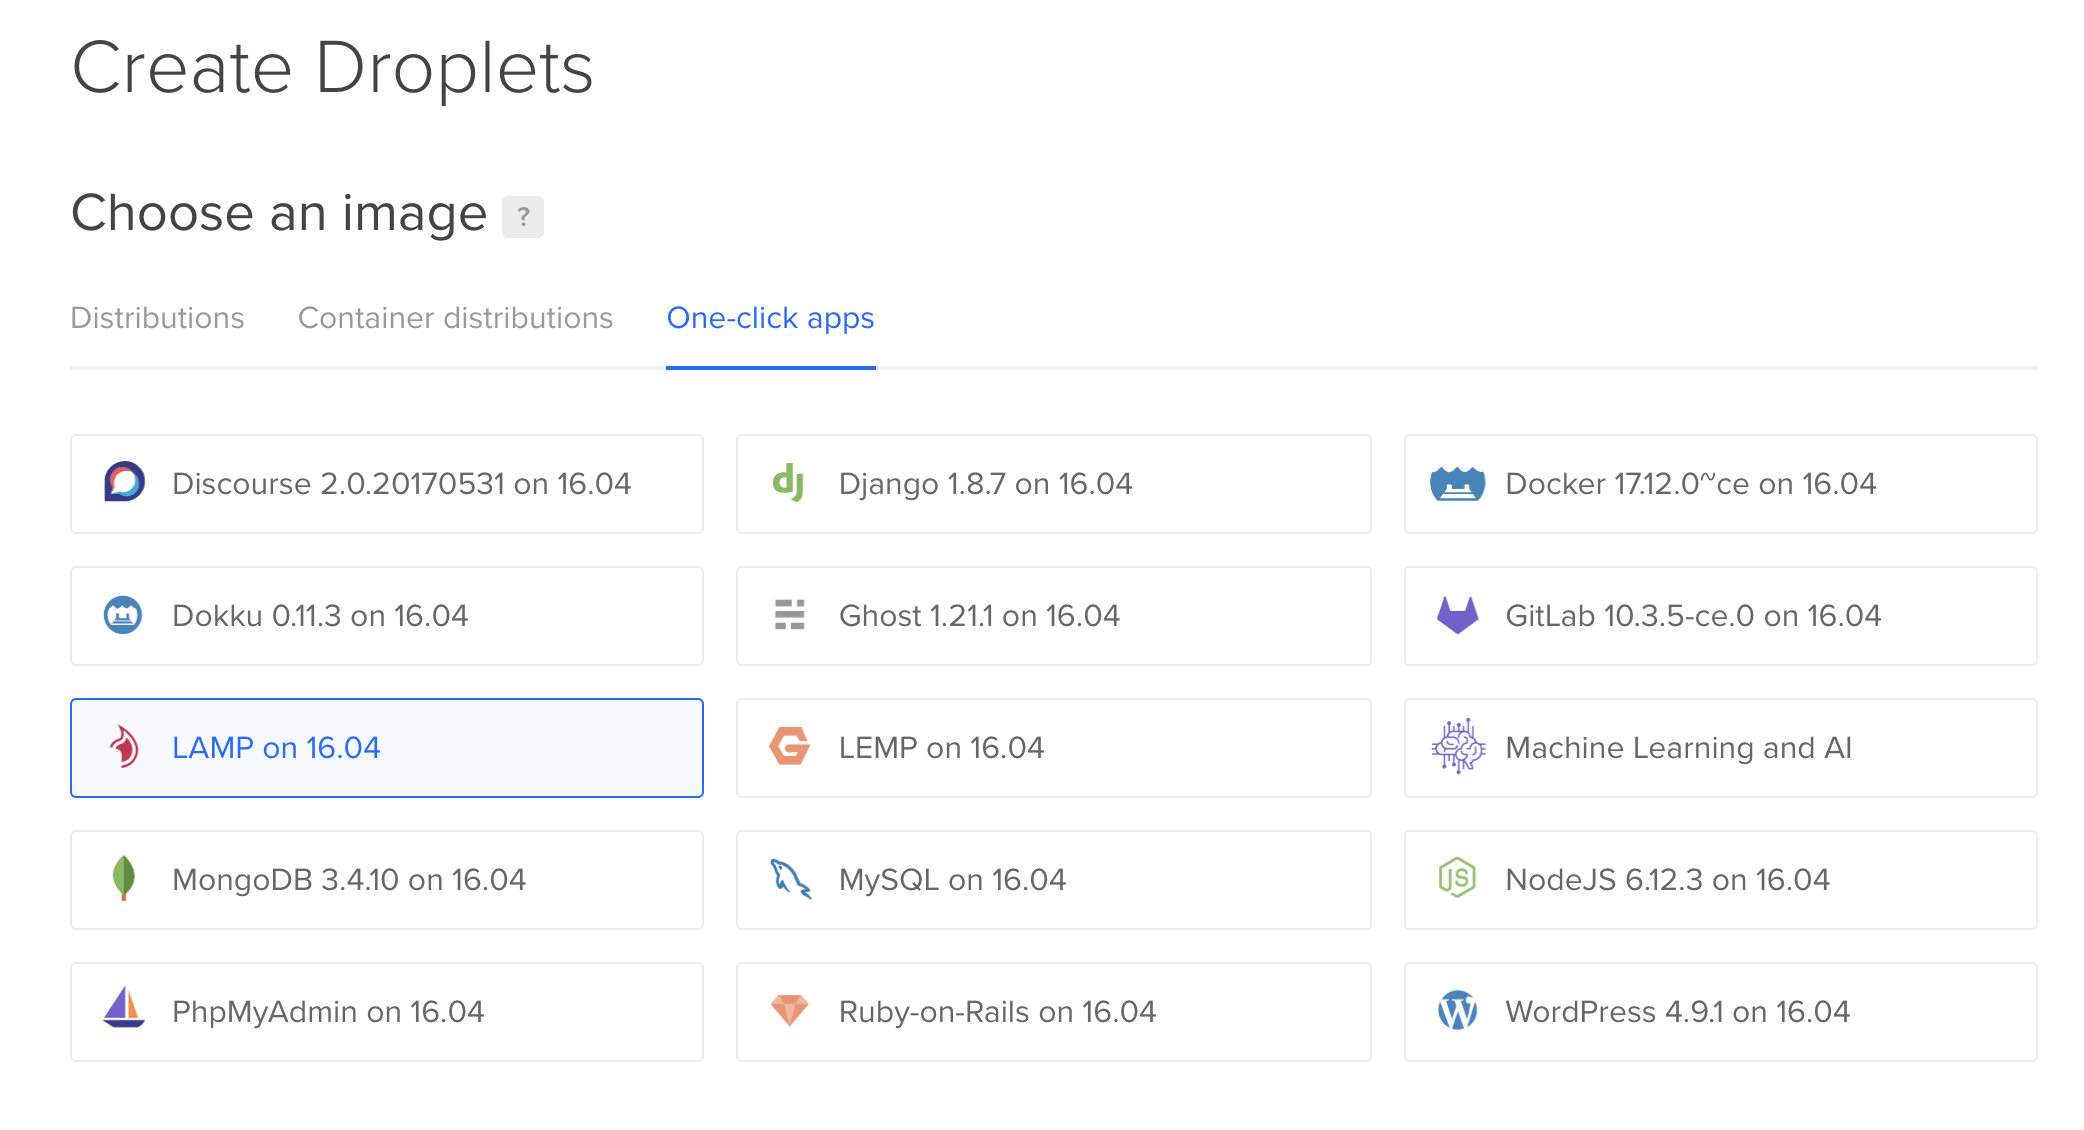
- The easiest way to get up and running with the full suite of Linux, Apache, MySql, and PHP is with a pre-configured One Click Digital Ocean Droplet
- To create one, log in to your DigitalOcean account and click Create>Droplet.

- Select the One-Click Apps Tab and click Lamp on 16.04
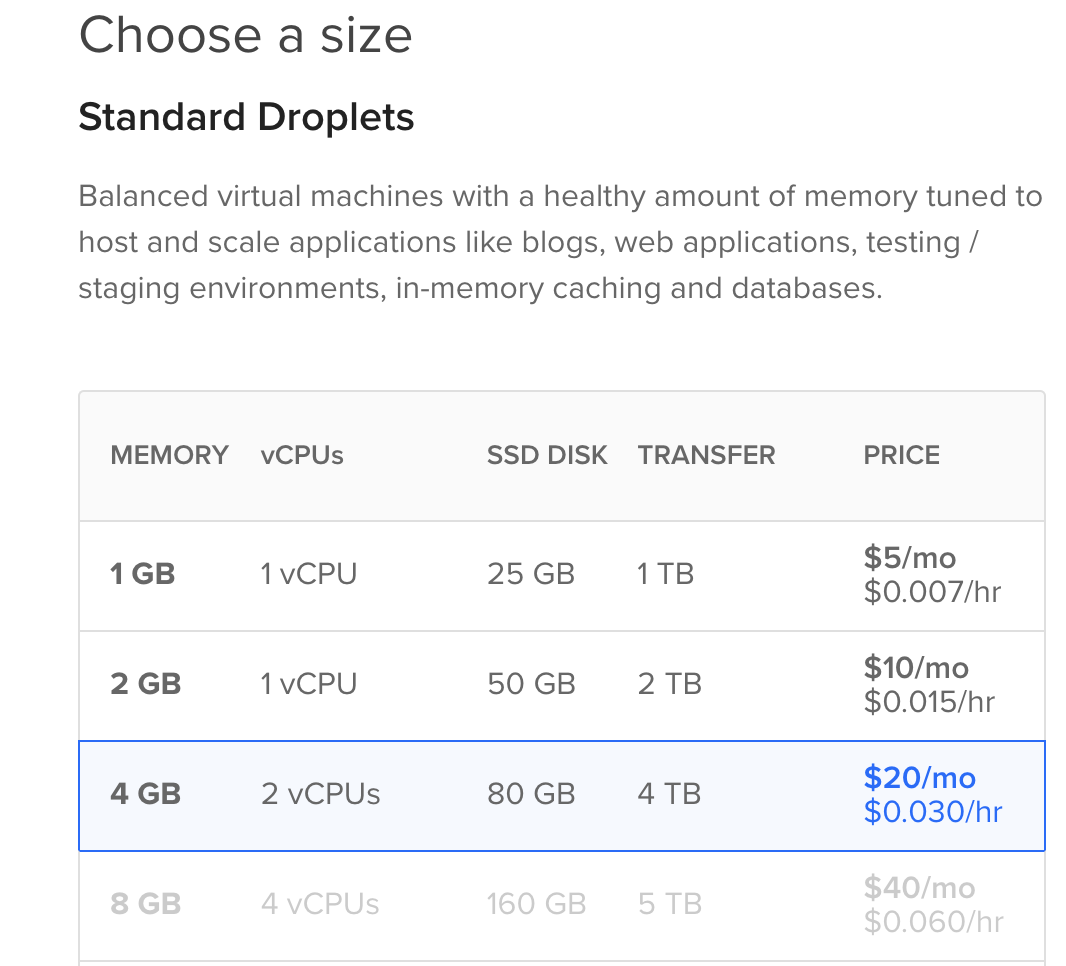
- Magento is a fairly intensive system, it's recommended to have at least 2 vCPU's
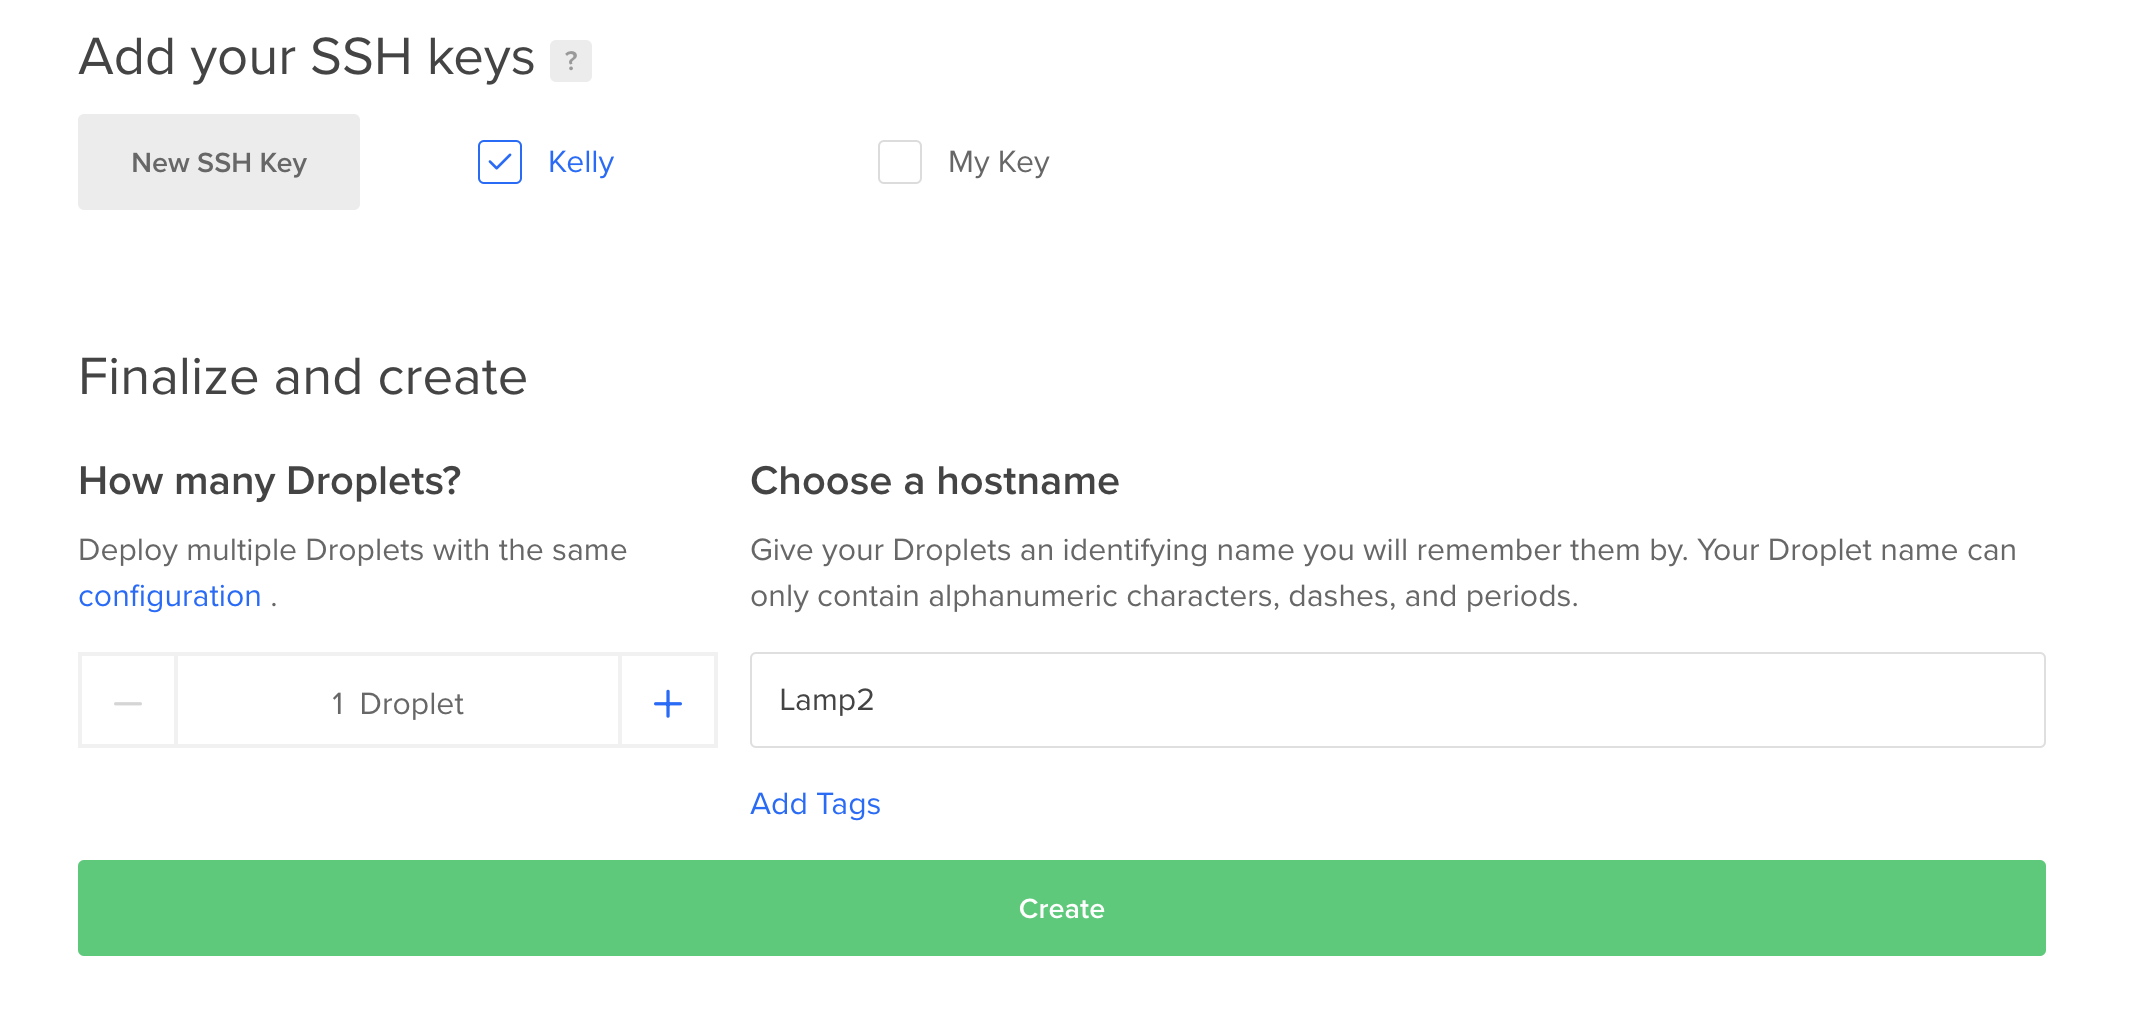
- Complete the steps until you reach New SSH Key
- Paste in your SSH Public Key which was generated a moment ago, DigitalOcean will validate the format, check that you copied correctly if you receive an error

- Finally, add a Host Name and click Create
- On the Droplets page (https://cloud.digitalocean.com/droplets) note the IP address of your Droplet — Save it.


Step 2: Create a non-root sudo user on your Ubuntu 16.04 Droplet (image)
Before we do anything we first need to SSH into our Ubuntu 16.04 Server on DigitalOcean. After, we will create a non-root user we will use for the rest of our installation. Make sure to use the same computer you generated the SSH Key on
- SSH into your Server & Save MySQL Password
- Open a terminal and run:
ssh root@{yourIP}ex.ssh root@159.62.343.122 - yourIP is the IP address of your Droplet in DigitalOcean, you should connect without entering a password because we have entered our SSH keys earlier.
- Once connected, some welcome text is displayed:
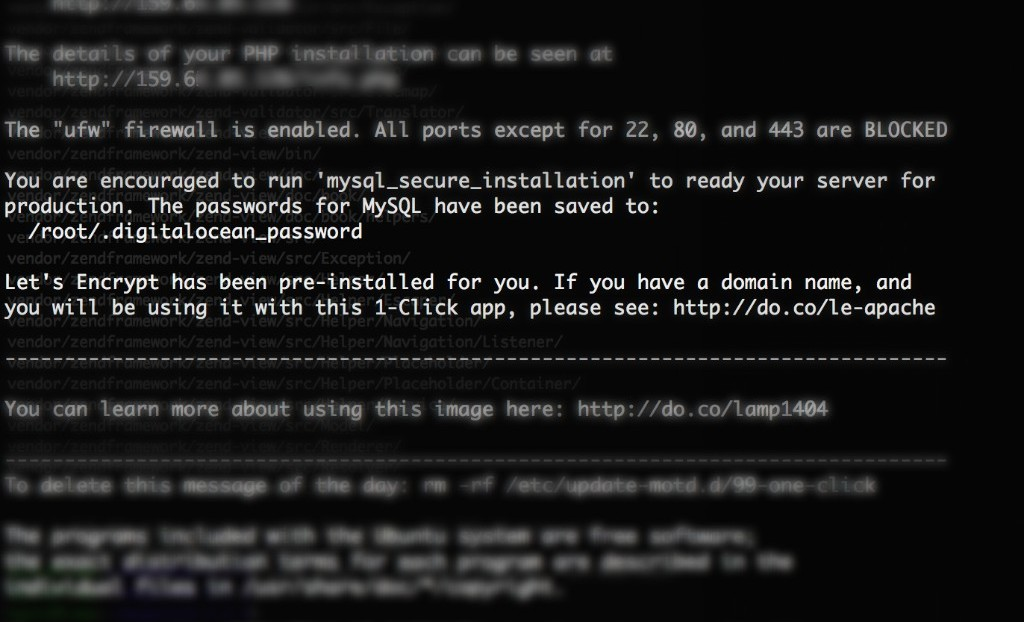
- MySQL is preinstalled on this image, note the file location of the MySQL Password, get the password by running cat on the file.
root@Lamp2:~# cat /root/.digitalocean_password - Note the MySQL Password — Save it.

- Open a terminal and run:
- Create a non-root sudo user
- Create a new user with sudo privileges.
- If you need guidance creating a new user, check out another great guide from DigitalOcean. Follow every step here: https://www.digitalocean.com/community/tutorials/how-to-create-a-sudo-user-on-ubuntu-quickstart


Step 3: Configure Apache Virtual Host
Next we will configure Apache Virtual Host, this will ensure that Apache understands how to handle Magento. We will create a virtual host config file in the directory: /etc/apache2/sites-available/d
- Use a text editor to create the config file, I use vim, and have called my file magento.conf
sudo vim /etc/apache2/sites-available/magento.conf
- Paste the following into the config, write, save, and close the file.
<VirtualHost *:80>
   DocumentRoot /var/www/html
   <Directory /var/www/html/>
      Options Indexes FollowSymLinks MultiViews
      AllowOverride All
   </Directory>
</VirtualHost>
- After saving the
magento.conffile, enable the new Apache site by running the following command.
sudo a2ensite magento.conf
- Disable the default host file that came with Apache to avoid any conflicts with our new host file.
sudo a2dissite 000-default.confSeeking a deeper explanation for Apache Virtual Host steps? Refer to the DigitalOcean article Apache Virtual Host. The process for configuring Apache is the same on Ubuntu 14.04 and 16.04.
Step 4: Configure PHP Settings
Make sure to follow these steps for Ubuntu 16.04. The configuration of PHP for Magento 2 is different than Magento 1.9 on Ubuntu 14.04. Failure to follow these steps will result in our site not running properly.
Magento is a fairly intensive program to run and uses PHP for most of it's operations and indexing. It's a good idea to raise the memory limit Apache grants to PHP in our php.inifile. If we don't raise this limit we risk one of our scripts running out of memory causing the script to crash.
Magento 2.x is not compatible with php5. We are going to use php7.0, which is installed by default on our DigitalOcean Ubuntu server.
- Raise the Apache PHP memory grant
- Open the config file with a text editor
sudo vim /etc/php/7.0/apache2/php.ini- Find line
memory_limit = 128Mand change 128M to 512M . Write, save and close the file.

- Install PHP module dependencies
- Magento requires several PHP modules, let's install them. First let's update our packages, and then install the new modules
sudo apt-get update
sudo apt-get install libcurl3 php7.0-curl php7.0-gd php7.0-mcrypt php7.0-xml php7.0-mbstring php7.0-zip php7.0-intl
- Add Apache rewrite & PHP encryption support
- PHP commands default to the active version of PHP, since we only have PHP7.0 we can simply run phpenmod
sudo a2enmod rewrite
sudo phpenmod mcrypt
- Restart Apache to Apply Changes
sudo service apache2 restart
Step 5: Create a MySQL Database User in pre-configured LAMP 16.04 DigitalOcean Droplet
Magento uses MySQL to store data including products, orders, customers ect. We will need to configure MySQL to get it ready for use with Magento.
Remember the MySQL Password we saved from Step 2? You are going to need it here!
- Log into your MySQL root account, run
mysql -u root -p- Enter your password, the root password for MySQL is NOT your root password for Ubuntu. It's contained in the file:
/root/.digitalocean_password
- Create a database for Magento to use
- We will call our database magento, but you may name it whatever you'd like.
CREATE DATABASE magento;
- Create a user and grant all privileges
- We named our user
myuser1with passwordpassword, you may choose something else. CREATE USER myuser1@localhost IDENTIFIED BY 'password';GRANT ALL PRIVILEGES ON magento.* TO myuser1@localhost IDENTIFIED BY 'password';
- We named our user
- Apply the user changes & exit MySQL
- Flush privileges in MySQL to let MySQL know that we have made some changes and to apply them, then exit.
FLUSH PRIVILEGES;
exit
Step 6: Download and Setup Magento Files for Magento 2.x
Now that we have configured our server, we can install Magento and begin the setup. First we will download and unpack the files, then complete setup through the UI of our new instance of Magento. In our example we will install Magento 2.0.18. Visit the Magento Github Releases page to find the release of Magento to install: https://github.com/magento/magento2/releases
- Go to your root directory and use wget to download the tar file.
- Extract the files using
tartar xzvf 2.0.18.tar.gz
- Navigate to the new directory created by unzipping the file.
cd magento2-2.0.18/
- Install Composer to check dependencies
- Composer is a tool that checks dependencies for PHP, it will also generate our Autoload files for us, which will ensure that Magento is visible in the UI.
- In the Magento root directory, run
sudo apt-get install composer
composer install
- The output should be green, and there should be no "problems"
- Use rsync to copy all magento files to our Apache root directory
sudo rsync -avP /root/magento2-2.0.18/. /var/www/html/
- Assign Ownership of the files to the Apache User Group
sudo chown -R www-data:www-data /var/www/html/
- Restart Apache
sudo service apache2 restart
Step 7: Complete Magento Installation in the UI
If you have reached this step, congrats! We are just about finished with the setup, and we've completed our work in the terminal.
- Navigate to your servers public IP, the same IP you SSH with
http://server-Domain-Or-IP-Address/
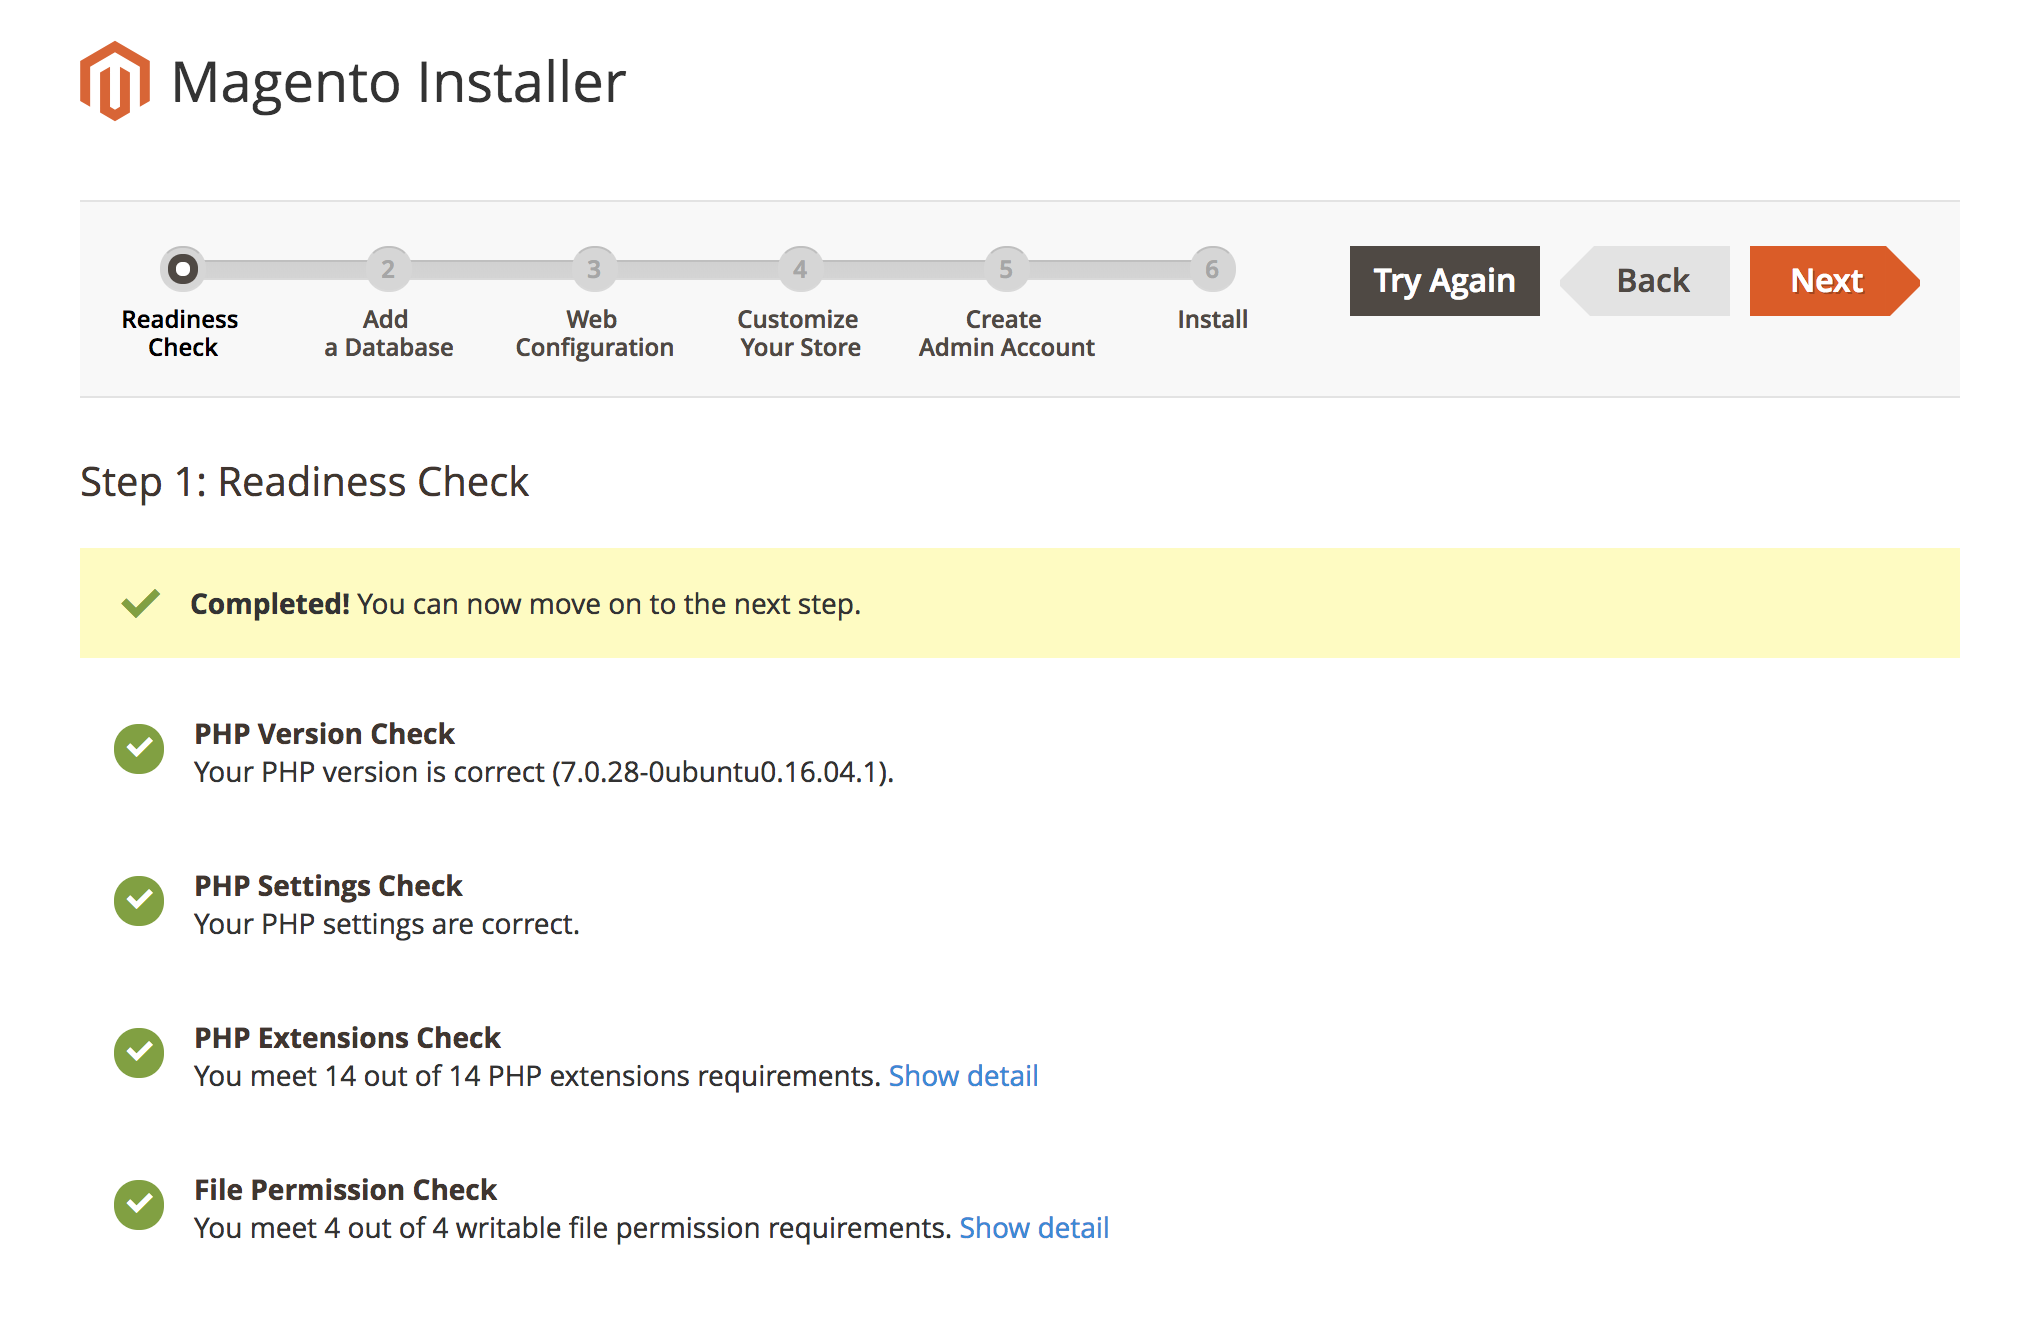
The resulting page should look something like this, click Agree and Setup Magento

- Complete the readiness check
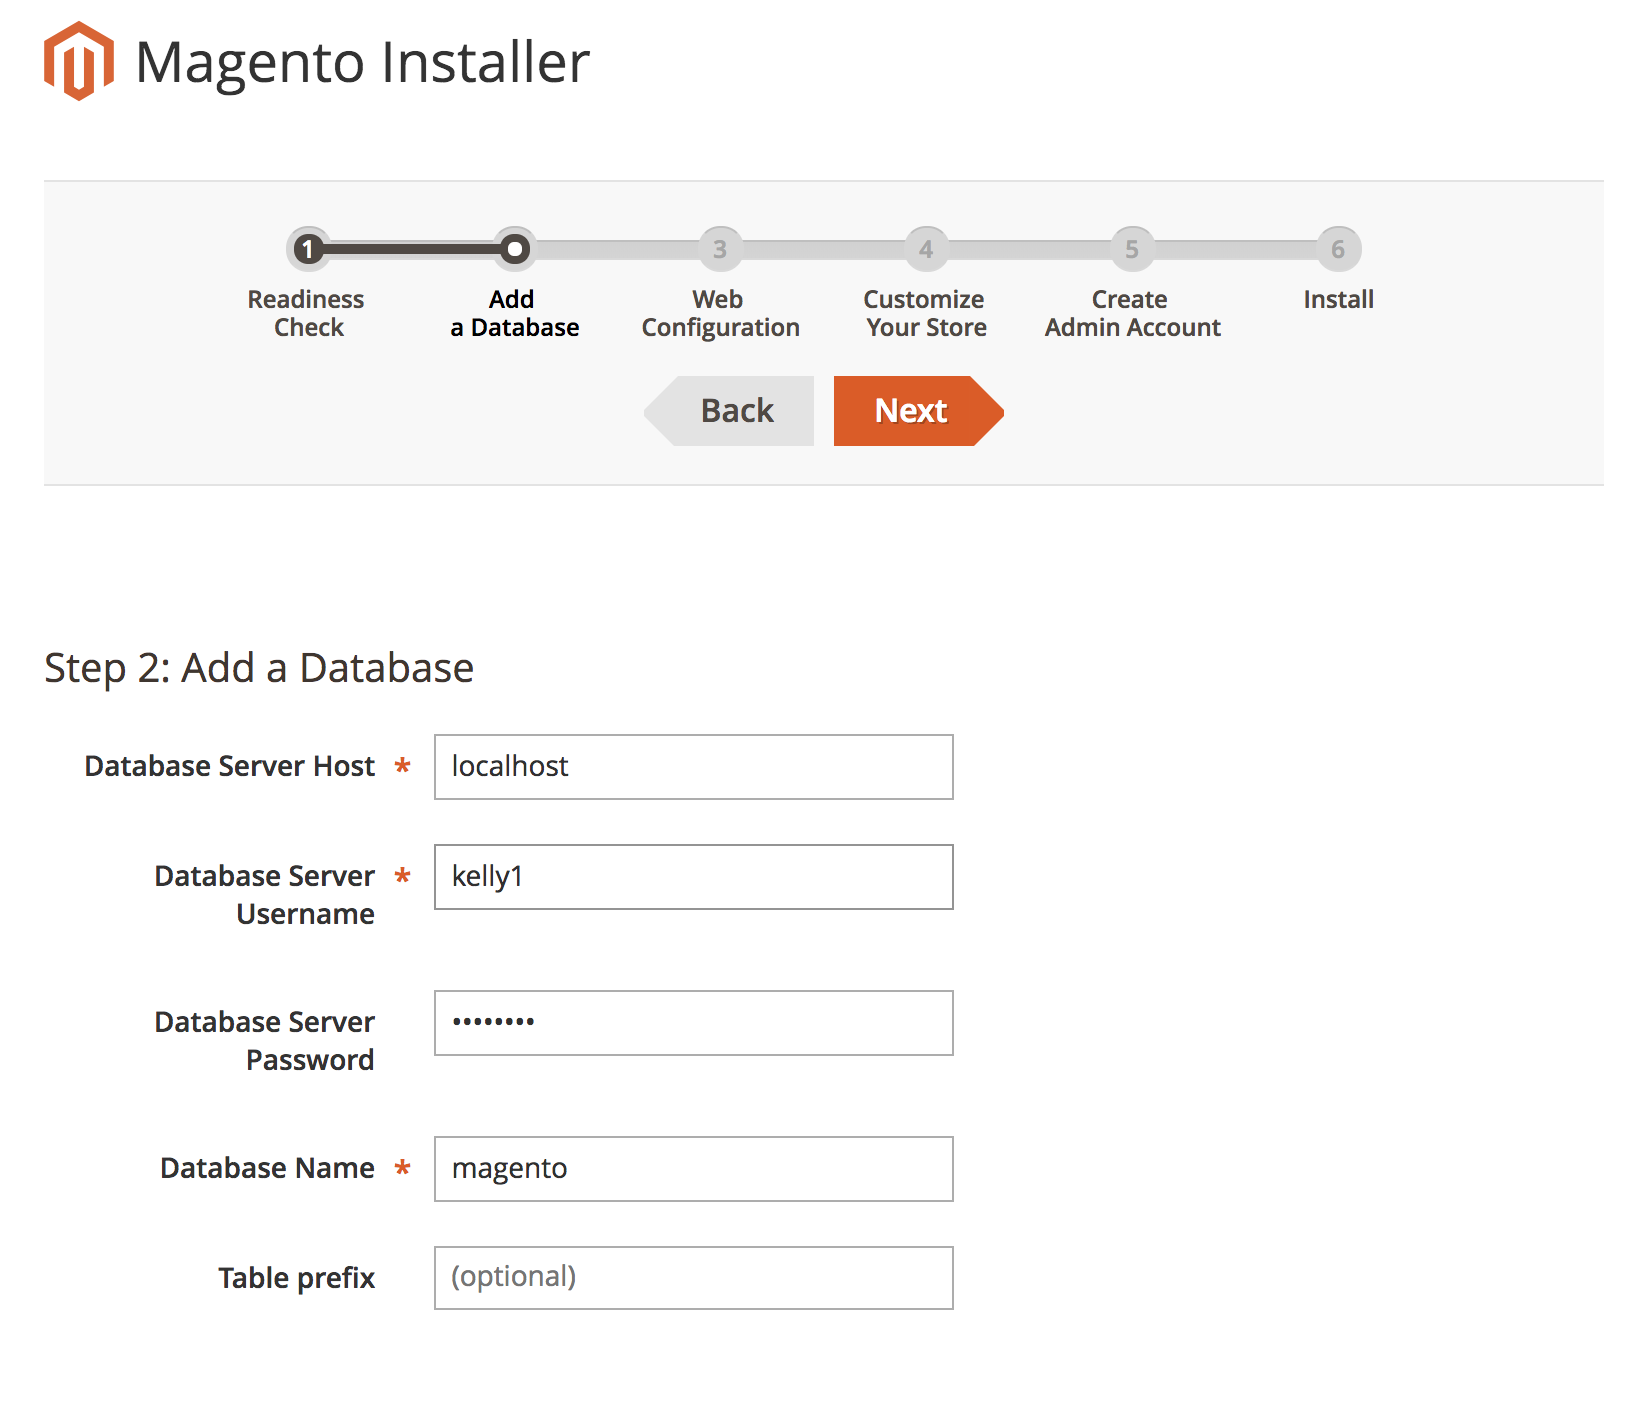
- Add MySQL Login information
- Enter your MySQL Host, Database Name, User Name, and Password created when we configured MySQL in Step 5. It's recommended you log in with a non-root user for security. Click Next
- Set an Admin URL for your store

- Complete Customize Your Store, and Create Admin Account (Make sure to choose a strong password!)

- Finally, Select Install

Be sure to save the information presented after install, as this info is difficult to retrieve.

Step 8: Launch Magento & Generate API Credentials
You've reached the end! You should now be able to log into Magento Admin with your newly created Admin account.
Don't forget to generate your API Key and Secret! For more information, Magento API Provider Setup.
