In this section, you will learn how to clone from a resource template or create your own virtual data resource. You can create a virtual data resource from scratch or clone them from existing resources (templates, existing virtual data resource, or a resource available through an element). This topic includes instructions for all methods. Please note that as a prerequisite to creating a virtual data resource from a custom resource or custom element, you must have models defined before a virtual data resource can be created. For more information on this, please see this article.
Create a New Virtual Data Resource
Follow the instructions in this section to create a new virtual data resource from scratch. When finished, you will have a resource with a single default field called id.
Create a Virtual Data Resource in the UI
- Access the Virtual Data Resources page.
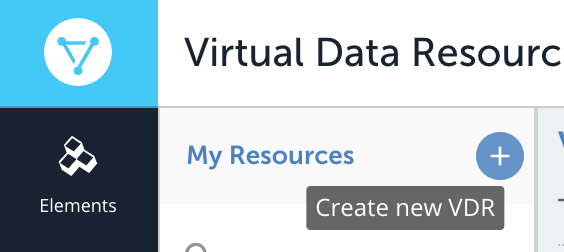
- Click Build a New Virtual Data Resource.
The Create page shows your new resource.
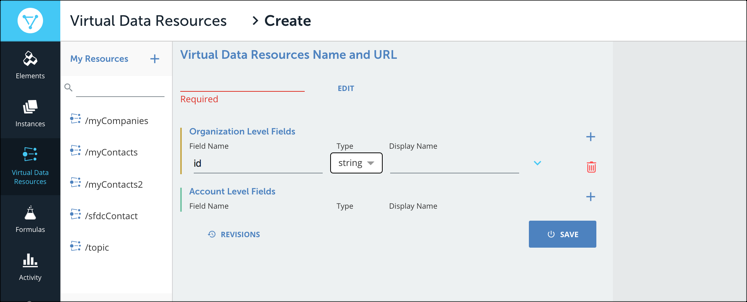
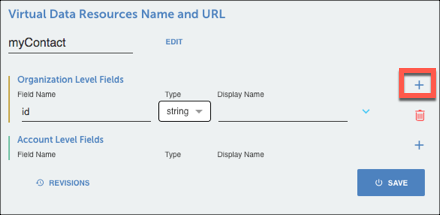
- Enter a name for your virtual data resource, such as "myContact".
- Optionally add a Display Name. You can use the display name instead of the field name when building user interfaces.
- Add additional fields: In the Organization Level Fields section, click Add.
Click Save.
- Continue to the next step: map fields to create a transformation.
Create a Virtual Data Resource with the API
POST /organizations/objects/definitions request.curl -X POST \
'https://api.cloud-elements.com/elements/api-v2/organizations/objects/definitions' \
-H 'authorization: User sAfK7LJGNz5ZHcNrvdJvLI=f03WbTbH6aRKc0HJ3oOIi, Organization 58168435e3b9959a929eb04b6218b9a2' \
-H 'Content-Type:application/json' \
-d '{
"myResource":{
"fields":[
{
"path":"firstName",
"type":"string"
},
{
"path":"lastName",
"type":"string"
}
],
"level":"organization"
}
}'Request Body Parameters
| objectName | The name of the virtual data resource. | Required |
| fields | An object containing the field names and data types of the resource. | Required |
| path | The name of the field. | Required |
| type | The data type of the field. | Required |
| level | The level at which the field exists, either organization, account, or instance. Organization users can create fields at any level, account users can create fields only at the accountor instance level. | Optional |
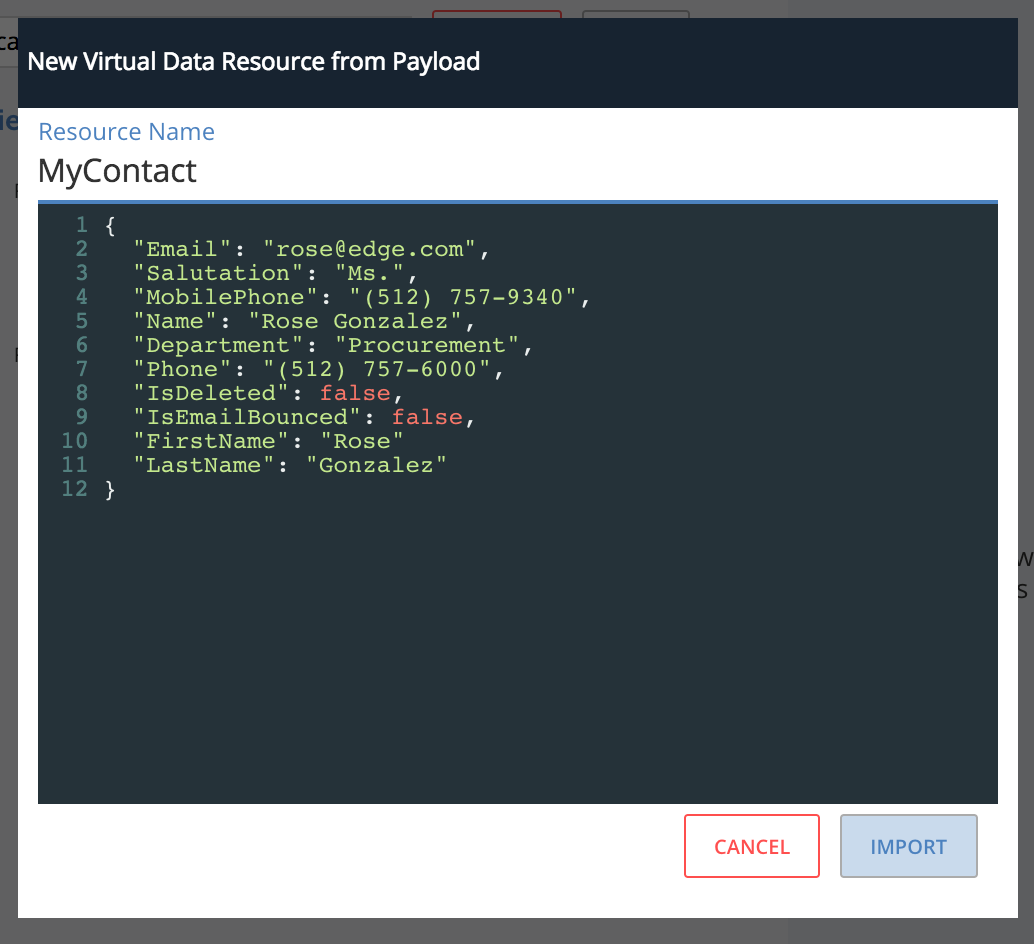
Create a New Virtual Data Resource by Importing a JSON Payload
- Access the Virtual Data Resources page and click Create New Virtual Data Resource.
- Click IMPORT
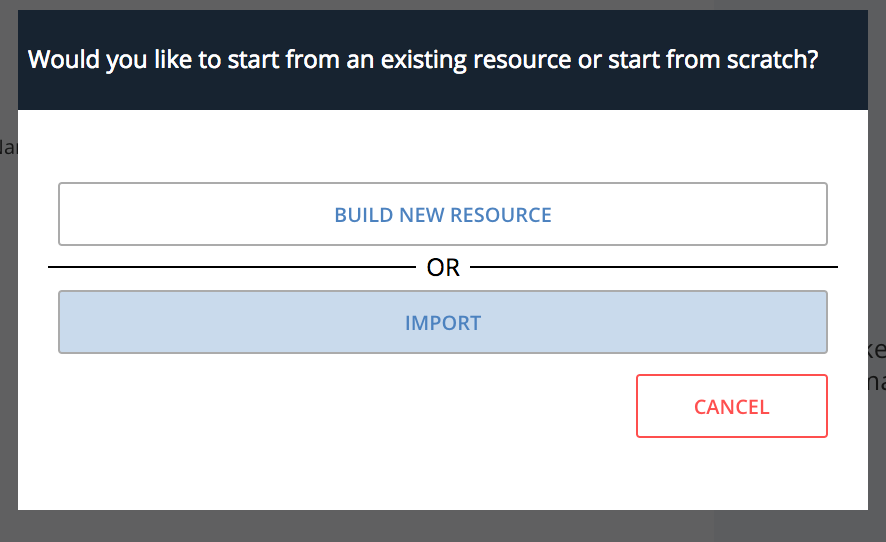
- Name your resource and paste your sample payload and click IMPORT
Add additional fields: In the Organization Level Fields section, click Add.

Continue to the next step: map fields to create a transformation.


Note: When creating custom VDRs or resources, make sure that the name does not contain the string “events” as it conflicts with the events API endpoint. This causes the GET and POST API calls to fail.
Example:
GET `/events/eventTest` → works.
GET `/events/eventsTest` → does not work.
Clone from a Virtual Data Resource Template
Virtual Data Resource templates provide detailed fields for frequently integrated resources and mappings to popular API providers. You can clone from the templates to create default mappings to the API providers. We clone fields to the account level but you can adjust the field level after cloning.
During the cloning process, you select the API providers to include in the mappings. You do not need to have existing authenticated instances of the elements that you select. The cloning process creates default mappings at the element level, so later, when you authenticate an element instance, the default mappings apply to it.
- Access the Virtual Data Resources page.
- Click VDR Templates.
- Select the resource to clone.
- Click Clone above or below the list of fields.
We show you the list of premapped API providers and their resources that we've already mapped. If the list is long, use Search to find a specific API provider.
- Select the API provider mappings to include in your resource, and then click Confirm.
Regardless of which API providers you selected, only those with existing authenticated element instances appear on the Mapped Transformations (right) side. When you authenticate with the API providers later, the instances will appear here.
- Optionally rename the resource. Click Edit next to the name, change the name, and then click Save.
After cloning, you can add or remove fields, add display names, and even update the transformations.
Clone an Existing Virtual Data Resource
You can clone a virtual data resource and customize the new resource. You might do this to create variations for multiple different accounts.
Clone a Virtual Data Resource in the UI
- Access the Virtual Data Resources page.
- Click Build a New Virtual Data Resource.
The Create page shows your new resource with a default organization-level field of id.
- On the bottom left, click Create from Existing Resource.
- Select an existing resource from the list.Tip: If the list is long, use Search to filter it.
- Enter a name for your resource, and then click Create.
The Transformations page shows your new virtual data resource with all of the fields that were in the original resource.
Continue to the next step: map fields to create a transformation.
Clone a Virtual Data Resource with the API
Endpoints used:
- Make a
GET /organizations/objects/{objectName}/definitionsrequest, replacing{objectName}with the name of the virtual data resource that you want to clone.curl -X GET \ 'https://api.cloud-elements.com/elements/api-v2/organizations/objects/myResource/definitions' \ -H 'authorization: User sAfK7LJGNz5ZHcNrvdJvLI=f03WbTbH6aRKc0HJ3oOIi, Organization 58168435e3b9959a929eb04b6218b9a2' \ -H 'Accept:application/json' - Compose a
POST /organizations/objects/definitionsrequest. - Copy the
fieldsarray in the response from step 1 to the JSON body forPOST /organizations/objects/definitions. - Submit the
POST /organizations/objects/definitionsrequest with the fields array from step 1.curl -X POST \ 'https://api.cloud-elements.com/elements/api-v2/organizations/objects/definitions' \ -H 'authorization: User sAfK7LJGNz5ZHcNrvdJvLI=f03WbTbH6aRKc0HJ3oOIi, Organization 58168435e3b9959a929eb04b6218b9a2' \ -H 'Accept:application/json' \ -H 'Content-Type:application/json' \ -d '{ "clonedResource":{ "fields":[ { "path":"firstName", "type":"string" }, { "path":"lastName", "type":"string" } ], "level":"organization" } }' - Continue to the next step: map fields to create a transformation.
Request Body Parameters
| objectName | The name of the virtual data resource. | Required |
| fields | An object containing the field names and data types of the resource. | Required |
| path | The name of the field. | Required |
| type | The data type of the field. | Required |
| level | The level at which the field exists, either organization, account, or instance. Organization users can create fields at any level, account users can create fields only at the accountor instance level. | Optional |
Clone a Resource From an Element
You can clone resources available through an API provider's element. You might do this to create variations for multiple different accounts. For example, if you want your /contacts resource to match the data in the Salesforce Contact resource, create a new resource by cloning the Salesforce Contact resource.
- Access the Virtual Data Resources page.
- Click Build a New Virtual Data Resource.
The Create page shows your new resource with a default organization-level field of id.
- On the bottom left, click Create from Existing Resource.
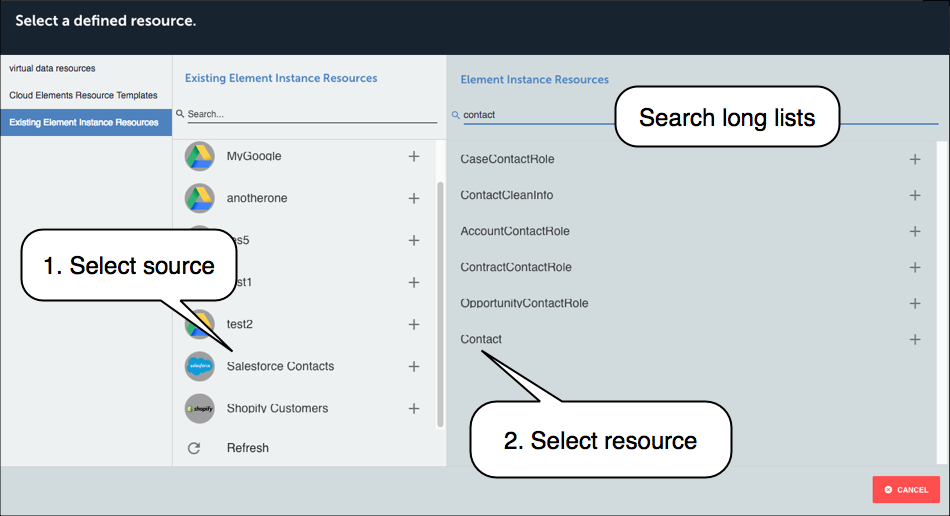
- Click Existing Element Instance Resource.
- From the Existing Element Instant Resources list, select the element instance that contains the resource that you want to use.
- From the Element Instance Resources list, select the resource.Tip: If the list is long, use Search to filter it.
Enter a name for your resource, and then click Create.
The Transformations page shows your new resource with all of the fields in the Virtual Data Resource instance resource. We've already mapped the source element instance to your resource.
Continue to the next step: map fields to create a transformation.
View Your Virtual Data Resources
To see all of your virtual data resources in the My Resources catalog, click Virtual Data Resources on the left navigation menu.
The resource cards show the mapped to the virtual data resource. If you haven't mapped any yet, the card prompts you to add a mapping.
Sorting Virtual Data Resource Fields
On the Mappings tab, fields can be sorted alphabetically, most frequently mapped, or unmapped first. You can sort the listed fields by clicking the Sort Fields By: menu and selecting an option.
List Resources with the API
Get a list of virtual data resources with GET /organizations/objects/definitions
curl -X GET \
  https://api.cloud-elements.com/elements/api-v2/organizations/objects/definitions \
  -H 'authorization: User sAfK7LJGNz5ZHcNrvdJvLI=f03WbTbH6aRKc0HJ3oOIi, Organization 58168435e3b9959a929eb04b6218b9a2' \
  -H 'Accept: application/json' \
Rename Virtual Data Resources
When you rename a virtual data resource, be aware that it could potentially affect formulas that reference the resource. We check formulas for the resource name and warn you if we find it.
However, we do not check everything in formulas. The name could be part of javascript code, or used in a path description. We recommend that you investigate your formulas before renaming to prevent errors.
Rename a Virtual Data Resource in the UI
On the Transformations page, click Edit next to the name, rename it, and then click Save.
Rename a Virtual Data Resource with the API
Change the name of a virtual data resource at the organization, account and instance level by passing a new objectName in the request body of the following endpoints:
PATCH /organizations/objects/{objectName}PATCH /accounts/objects/{objectName}PATCH /instances/objects/{objectName}
If the virtual data resource includes different level fields, those are not changed by this request. This essentially splits the resource where the renamed resource includes only the fields at the level of the endpoint while the previous name includes only fields at the other levels. Use the other endpoints to change the name of the virtual data resource associated with the different level fields. Once all levels are changed, the resource is unified under the new name.
Example Request
curl -X PATCH \
  'https://api.cloud-elements.com/elements/api-v2/organizations/objects/{{objectName}}' \
  -H 'Accept: application/json' \
  -H 'authorization: User sAfK7LJGNz5ZHcNrvdJvLI=f03WbTbH6aRKc0HJ3oOIi, Organization 58168435e3b9959a929eb04b6218b9a2' \ \
  -d '{
"objectName" : "newObjectName"
}'
Example Response
{
  "id":69496,
  "objectName":"newObjectName",
  "fields":[
    {
      "type":"string",
      "path":"firstName"
    },
    {
      "type":"string",
      "path":"lastName"
    }
  ],
  "level":"organization"
}
