You have created a virtual data resource and mapped fields to it to create a transformation. Now you want to export it to share across your organization and/or different accounts. Here is a quick guide on how to properly export a virtual data resource.
- Log in to the platform environment where the virtual data resource was created (i.e. your production environment, staging environment, etc.)
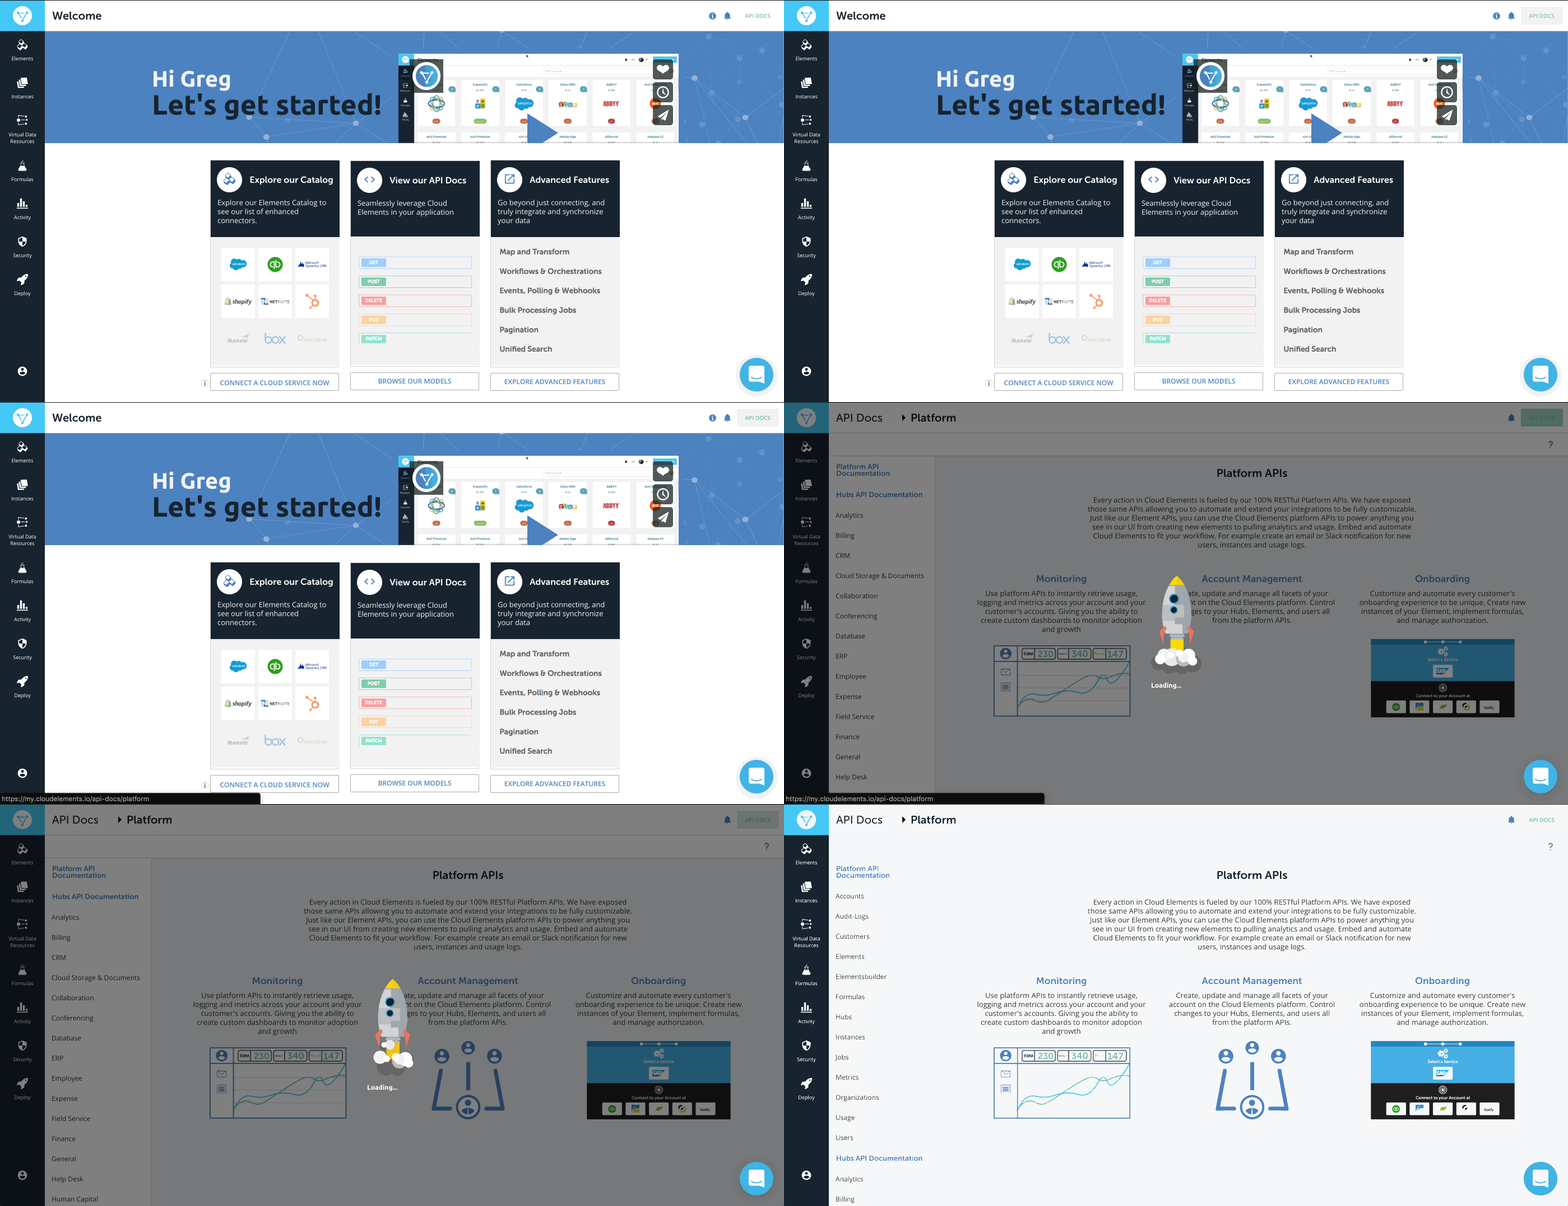
- On the top right of the Welcome page, click on API Docs option as shown here:

- On the left side, under Platform API Documentation, you will select the level in which your transformation was created (i.e. Account, Instance, or Organization). If you are not sure what level your transformation currently lives, see Organizations, Accounts, and Users. In this example, I will use a virtual data resource created at the Organization level.
- Once you have selected your virtual data resource level, navigate to
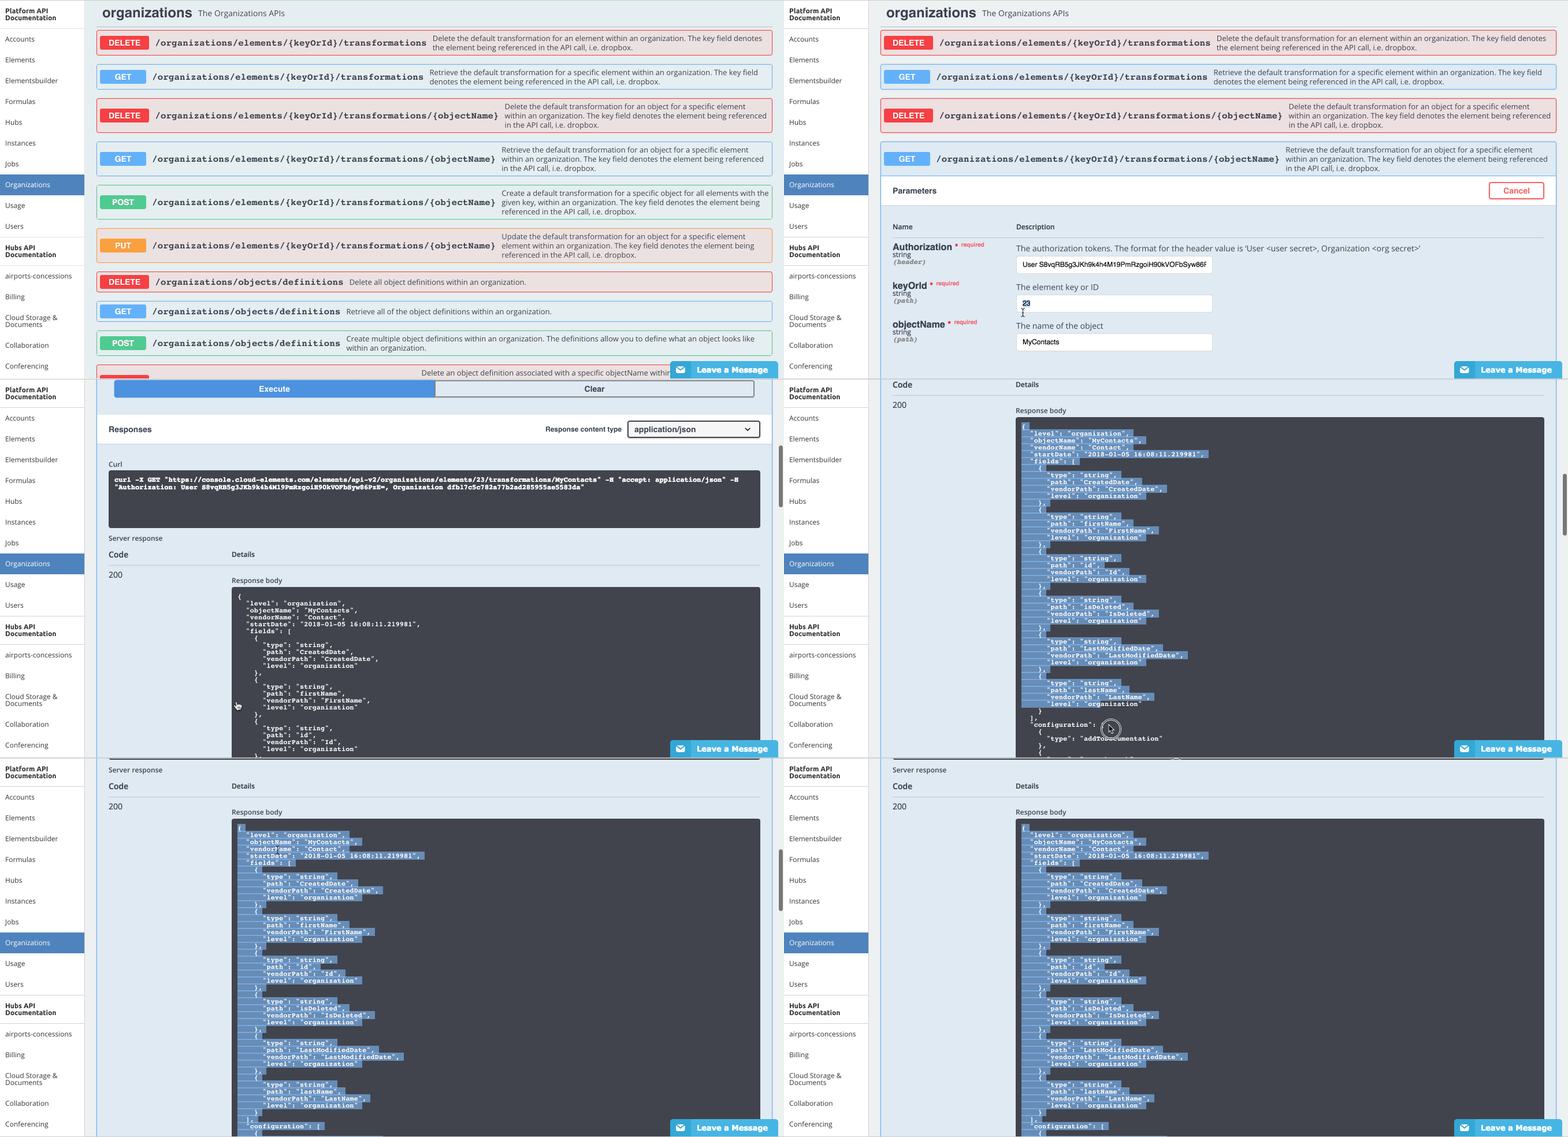
GET /organizations/elements/{keyOrId}/transformations/{objectName}. The{keyOrId}stands for "Key or Id" of the element (e.g., element name: Salesforce Sales Cloud, element key: sfdc, Element Id: 23) and{objectName}is the name of the virtual data resource you will be exporting (e.g., "MyContacts"):
- As shown in the example above, copy the returned payload and you are ready to import this virtual data resource in different environments, accounts, etc..


