To authenticate a Salesforce Sales Cloud element instance, you must have the Salesforce Sales Cloud Enterprise edition or Professional edition with API support. Also, to set up a new application in Salesforce Sales Cloud, you must have Administrator privileges. Contact your system administrator if you do not have those privileges.
Note: Salesforce provides the most up-to-date and detailed setup instructions at Salesforce.com REST API Developer Guide
To set up the endpoint:
- Via a web browser, log in to your Salesforce account. If not already on the Setup page, navigate to it.
- In the menu on the left, click Apps, and then click App Manager. Alternatively, you can also search for App Manager using Quick Find.

- Click New Connected App.
- Complete the Basic Information section.
- In the API (Enable OAuth Settings) section, select Enable OAuth Settings.
- Enter Callback URL- https://auth.cloudelements.io/oauth to redirect the user to Cloud Elements after authentication.
- In Selected OAuth Scopes, add the scopes needed from Available to Selected.Note: The default scopes are Full Access and Perform requests on your behalf at any time (refresh_token_, offline_access); if the default scopes do not correspond with the desired access, the scope parameter can be overwritten when sending the GET api call for the Oauth process to return the provider code.
- Complete the remaining settings as needed for your app.
- Click Save at the bottom of the window.
- Click Continue.
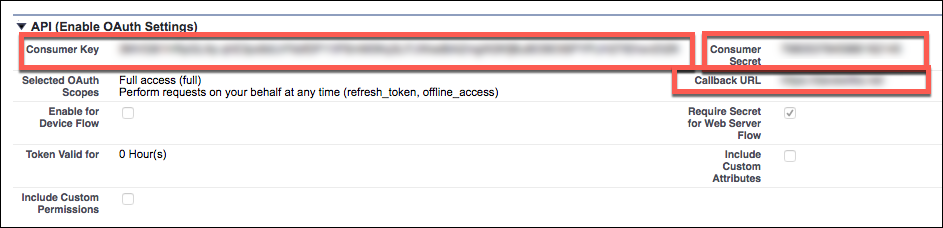
- Note the following in the API (Enable OAuth Settings) section, which you will need to authenticate a Cloud Elements Salesforce element instance with Salesforce.
- Consumer Key
- Consumer Secret
- Callback URL