Overview
In order to authenticate an instance of the Microsoft Dynamics 365 element, you must have the following:
- A Microsoft Azure Active Directory account
- A Microsoft Office 365 account
- A web application registered and configured with Azure Active Directory
Registering and Configuring a Web Application with Azure Active Directory
There are several required steps to registering and configuring a new web application in Azure AD. This section covers these steps, which include:
- Registering your application in the Azure Portal
- Recording the application ID
- Generating and recording the client secret
- Setting App permissions
Registering your Application in the Azure Portal
- In a web browser, navigate to the Azure Portal and sign in using your Azure Active Directory credentials.
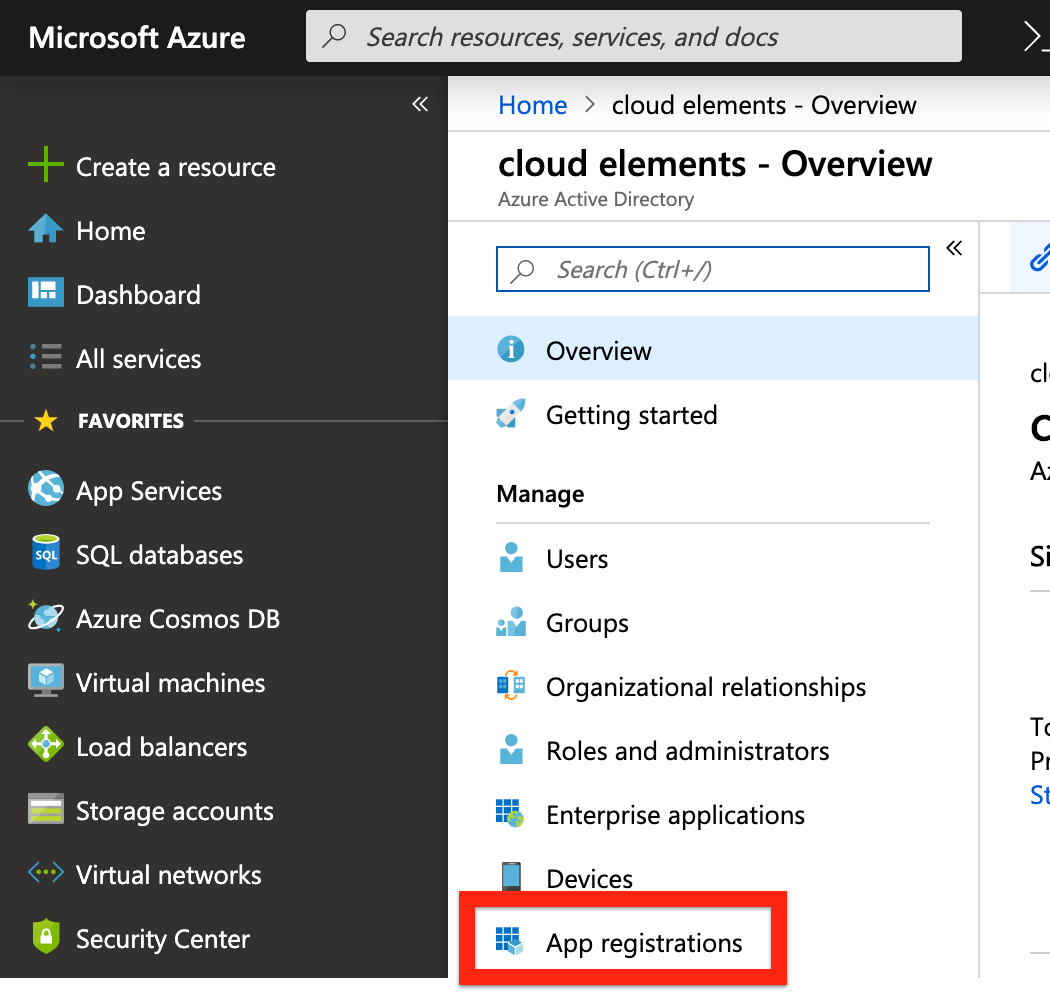
- From the left-hand navigation toolbar, select Azure Active Directory and then select App registrations.
- Select New registration.

- On the Register an application screen, enter a name for your application in the Name field, and then click Register; the supported account types and redirect URI will be configured later during this process. For more information on the application registration process, see Microsoft's documentation.


Recording the Application ID
After registering your new application, record the Application (client) ID as displayed in your application's overview page. You will use this string as the API key when you authenticate an element instance.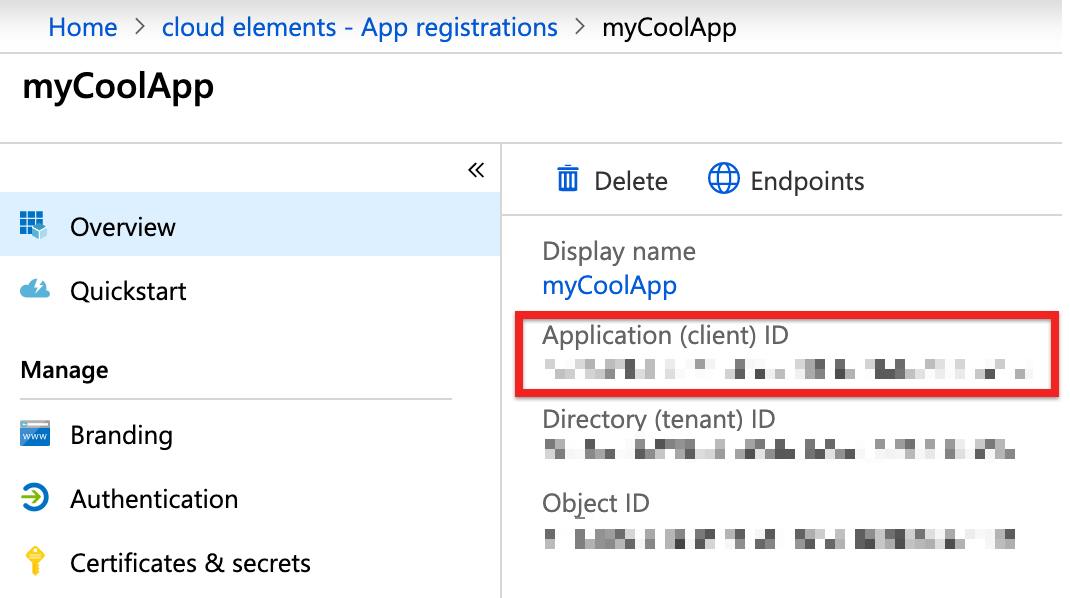
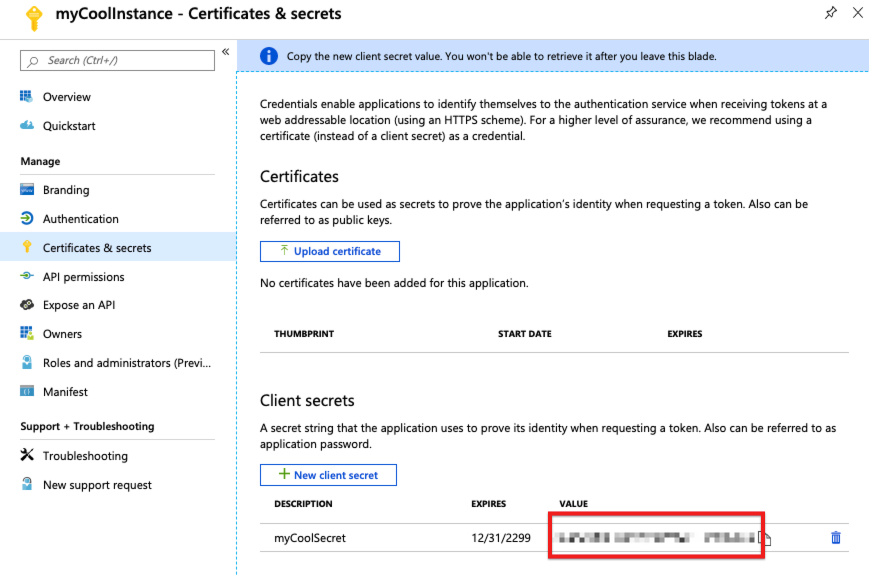
Generate and Record the Client Secret
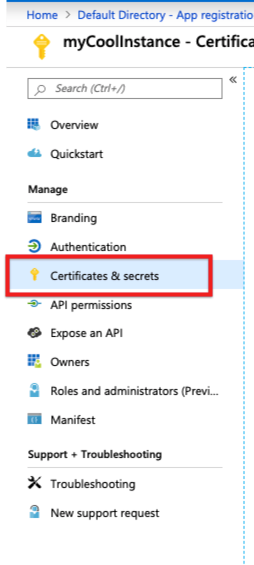
- Click Certificates & secrets.
- On the Certificates & secrets page, click the New client secret button.
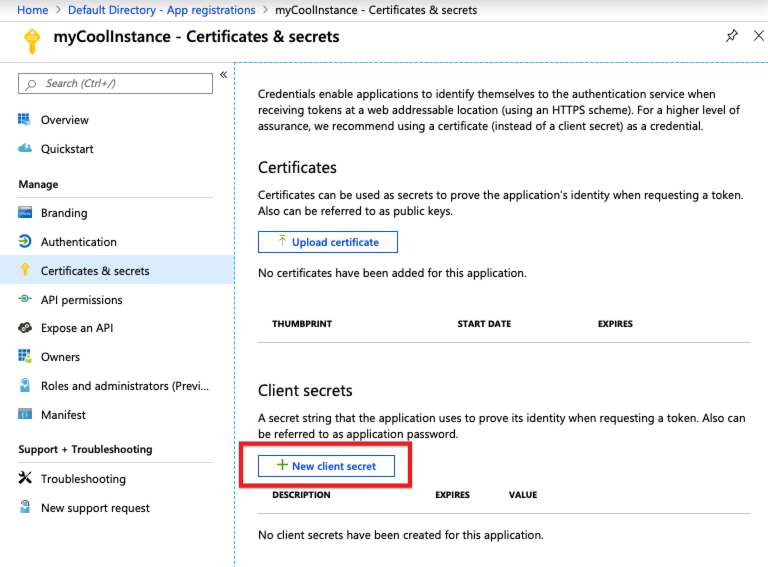
- In the Add a client secret window, add a name to the Description field, select Never, and then click Add.

- Under Client secrets, record the value for your newly created client secret. This value is your client secret, which you will use as the API secret when you authenticate an element instance.


Setting App Permissions
After exposing your APIs, you need to set app permissions depending on your requirements.
On the navigation panel to your left, click API permissions and then Add a permission, as shown in the picture below.

