In the course of developing and testing formulas, you may need to fix broken formula executions. In Cloud Elements, you can examine your {{snppet.termformulalcplural}} using both the Executions tab of the formula and the formula debugger.
Some ways you can use the formula features:
- Use both the Executions tab and the debugger in tandem, identifying any consistent problems from within the executions themselves and developing potential fixes using the debugger
- For scheduled or events-triggered formulas or formulas in production, use the Executions tab to review existing formula executions and their trail to identify issues with the formulas themselves, as well as any consistent points of failure they contain
- For other formulas used with the Try It Out function, use the formula debugger for visibility into the input and output of each step, as well as test possible solutions
Using the Formula Executions Tab
The Executions tab displays a list of each formula's executions, as well as each execution's trail. To access the Executions tab, follow these steps:
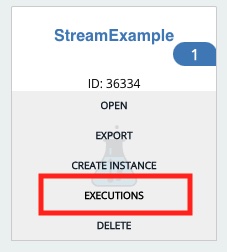
- From Formulas, hover over the card for your desired formula and select Executions.
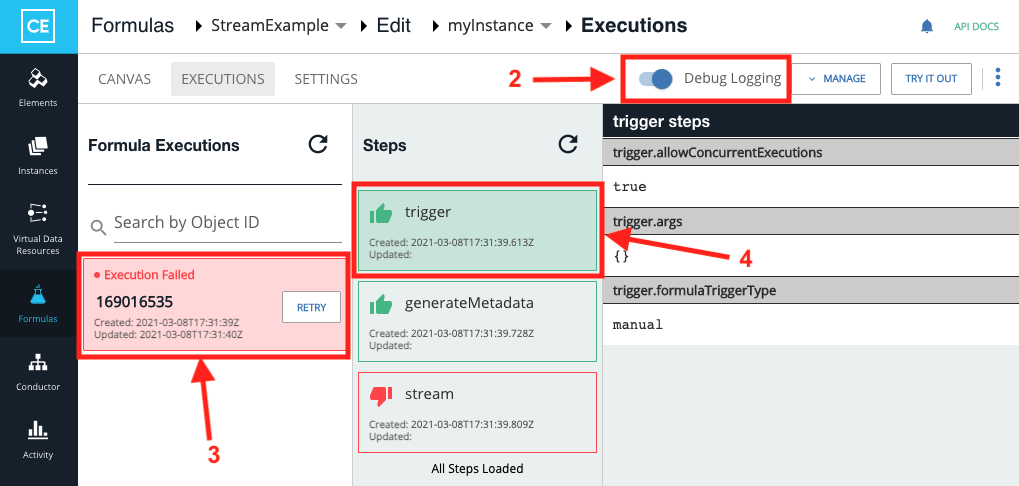
- On the Executions page, ensure that Debug Logging is enabled.
- Select the desired execution from the Formula Executions column to display its individual steps.
- Select a step to display its relevant request and response content.


About Formula Debugging
Using debugging, you can verify a step's behavior by executing it independently of preceding or succeeding steps, providing you with more detailed information about your formula's functionality without having to repeatedly rerun the entire execution. Typically, formula errors are due to invalid input that the step cannot process. Using the formula debugger, you can inspect the context for each step and quickly retry failed steps until you find a solution.
Using the Formula Debugger
In order to access the formula debugger, you need a formula instance run via the Try It Out feature.
- After creating a formula instance, open the formula template and select Try It Out.
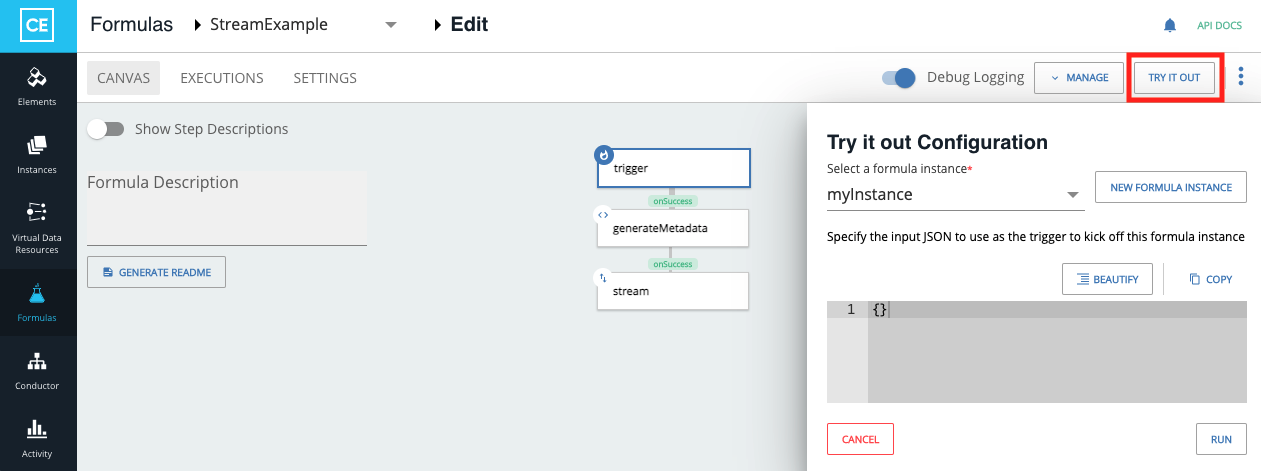
- Select the formula instance, specify an input JSON trigger as needed, and select Run. After the formula runs, the debugger displays context for the formula's properties: trigger, configuration, and info, as well as the steps.

- Select a step from the list to view its context. The step's Output is displayed.
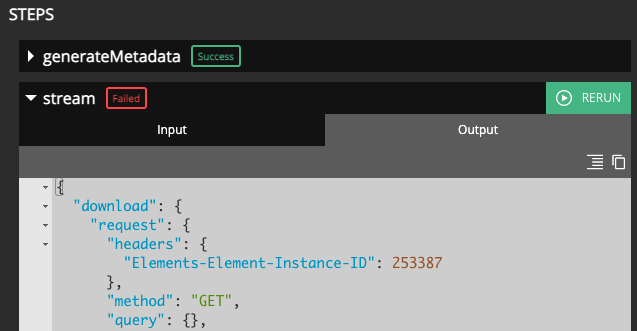
- Modify the output's context, which will be used for the subsequent step. For example, changing Step 2's output and re-running Step 3 will use the modified context from Step 2 as its input, allowing you to quickly test changes and find the expected input. Once identified, you can modify the step as necessary to achieve the expected output. Any modifications to the output will be automatically saved as you type, although navigating away from the debugger will lose any changes you've made to the output.
- From the Input tab, modify the step's input to adjust the input parameters for the step. When modifying step input, you must save for your changes to take effect before re-running the step; saving changes to the step input will also apply those changes to the formula itself.
- After making your modifications, click the Rerun button to rerun the step. Rerunning a step uses the previous context available in the step outputs preceding the step being rerun. This may generate output compared to the initial execution. Note that modified step outputs affect rerun steps, but do not affect the formula steps themselves.


Formula Debugger Best Practices and Limitations
- Before debugging a formula, you need to be familiar with our interface, models, and other concepts; review our Formula documentation if you need background.
- To use the debugger, you need to understand the context of the formula itself, which is built from the formula's trigger and information.
- Full debugging functionality is not available for subformulas; while you can rerun the entire subformula as an individual step, you cannot debug its individual steps.
- The debugger does not work with stream steps, retry-on-failure steps, or ActiveMQ Request steps.
- If you want to debug a scheduled or event-based formula, you will need to manually trigger it by adding JSON to the Try It Out configuration.
- While the debugger allows you to edit a formula's existing steps, you cannot use it to add new steps. After adding new formula steps, you will need to close the debugger; after returning to Try It Out, the new step(s) will be added and visible.
- All formulas are generally asynchronous; after sending the request, you receive a response. However, Cloud Elements continues monitoring formula executions. hence the Continue Polling button. If you see a yellow banner, your formula hasn't finished yet; you'll need to click Continue Polling to see the output. Cloud Elements continually checks the status for the most recent updates for thirty seconds; if it doesn't finish in 30 seconds, you have the "Stop Execution" button and the "[Check Status]" buttons; the execution will continue either way, but the Continue Polling button will give you an update on the latest status.
- If you stop an execution before it completes, debug information will not be available.
- The more steps your formula has, the longer the debugger may take to load the context, even after the formula has completed.
